Create a plugin
You can create plugins in two ways:
- Using the Sketch Plugin Manager
skpm, the official utility to create, build and publish Sketch plugins. - Manually by organizing all files yourself, directly or using a module bundler such as Rollup or webpack.
To get started quickly Sketch Plugin Manager provides a set of templates for different types of plugins, including Data Suppliers and plugins providing a user interface using a webview.
1. Use skpm
Requirements
You’ll need npm installed to install skpm and any dependency of your Sketch plugin.
Install skpm
Install the Sketch Plugin Manager using npm.
npm install -g skpm
View the usage instructions to see all available commands.
skpm --help
Create from template
Create a new plugin anywhere on your disk using the default plugin. skpm will automatically add a symbolic link to the Sketch plugins installation folder to make the plugin immediately available within Sketch.
skpm create my-plugin
The resulting folder contains the plugin sources and a generated Sketch plugin bundle. When making changes to the folder structure make sure to adjust the skpm settings within package.json if necessary.
.
├── README.md
├── assets
│   └── icon.png
├── my-plugin.sketchplugin
│   └── Contents
│       ├── Resources
│       │   └── icon.png
│       └── Sketch
│           ├── manifest.json
│           ├── my-command.js
│           └── my-command.js.map
├── node_modules
├── package-lock.json
├── package.json
└── src
    ├── manifest.json
    └── my-command.js
| Folder | Description |
|---|---|
*.sketchplugin |
The plugin bundle generated by the skpm build process. Do not edit any of the files within this folder, any changes will be overwritten with the next build. |
assets |
The folder for any resource files that should be bundled with the plugin. To use a different path or add folders, modify the skpm.assets setting within package.json. |
src |
The source folder containing the manifest and scripts to be bundled using webpack. |
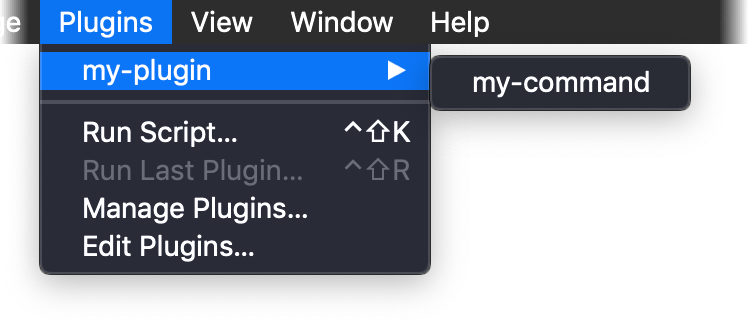
Switch to Sketch and run the plugin from the Plugins menu.
Quick tip: See the
skpmdocumentation for other templates.
Build the plugin bundle
After you make changes to the plugin source, you’ll need to rebuild the .sketchplugin bundle. Replace the contents of src/my-command.js with the following script.
import sketch from 'sketch'

export default function() {
  const doc = sketch.getSelectedDocument()
  const selectedLayers = doc.selectedLayers
  const selectedCount = selectedLayers.length

  if (selectedCount === 0) {
    sketch.UI.message('No layers are selected.')
  } else {
    sketch.UI.message(`${selectedCount} layers selected.`)
  }
}
Build the plugin using npm.
npm run build
To verify the plugin has been updated, create or open a Sketch document and select some layers. When you run the plugin again from the Plugins menu, you should now see the message with the number of selected layers.
Quick tip: Rebuild the plugin automatically after making changes by running
npm run watchinstead.
2. Manual
If you prefer using your own method to bundle the plugin, you must make sure to define the manifest correctly and include all scripts required for the plugin to run.
Example
This sample plugin contains two JavaScript files; command.js defines the handler invoked when the plugin’s menu item is selected within Sketch, and shared.js contains code imported by command.js using require.
.
└── Contents
    ├── Resources
    └── Sketch
        ├── command.js
        ├── manifest.json
        └── shared.js
manifest.json
The Manifest file tells Sketch how to run the plugin from the Plugins menu. For a full list of options see the Manifest documentation.
{
  "author": "",
  "commands": [
    {
      "script": "command.js",
      "name": "Greeting",
      "handlers": {
        "run": "onRun"
      },
      "identifier": "messages.greeting"
    }
  ],
  "menu": {
    "title": "Message…",
    "items": ["messages.greeting"]
  },
  "identifier": "com.bohemiancoding.sketch.messages",
  "version": "1.0",
  "description": "An introduction on how to build plugins.",
  "authorEmail": "developer@sketch.com",
  "name": "Messages"
}
command.js
const sketch = require('sketch')
const { randomEmoji } = require('./shared')

var onRun = function(context) {
  sketch.UI.message(`Hello Sketch ${randomEmoji()}`)
}
shared.js
let emojis = ['👋', '💎', '🛠', '🎉']

const randomEmoji = () => {
  return emojis[Math.floor(Math.random() * emojis.length)]
}

module.exports = {
  randomEmoji,
}
Running the plugin
Place your plugin in the plugins location, and once located there you can run the plugin manually from the plugins menu within Sketch.
Alternatively, if you’re comfortable on the command line you can use
sketchtoolto run the plugin instead.
Next steps
Read more about about debugging plugins and how to make them available to others.